Completed parts - 4
I'm still stressing the PVC pipe version. But the older versions are still in the code and (sort of) work. The time since the last code release was spent working on getting all the different versions not fighting each other. So I can release the code.
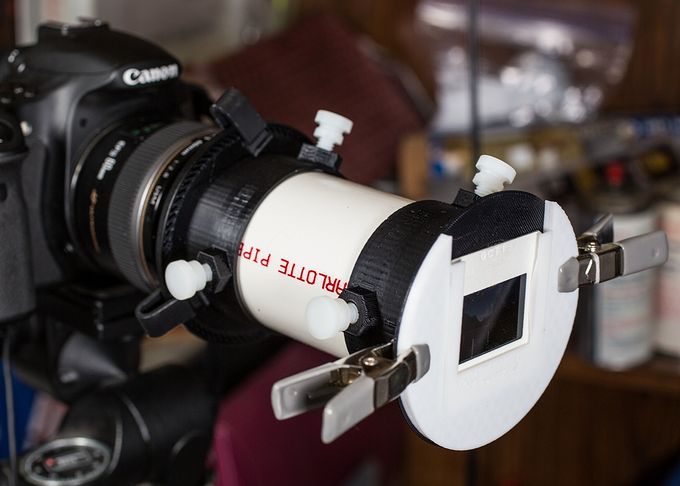
This is a current version of the PVC pipe design. (Make sure to read the previous description for information about PVC pipe, and such.) I ended up using Home Depot clips on the front plate because 3D printed clips didn't hold their shape. They bent under pressure (clipping the front plates together) and stayed bent.

One big change in the back bracket/tube is I had problems getting the 3D printed threads to work when the back plate was screwed into the step-ring (that screws to the lens). I switched to an alternate design that substitutes a bunch of slanted slits at the outside edge of the back plate. This is flexible enough that you can push (or twist) the back plate into the step-up ring. The slits will keep it centered. You still need to use clips to hold it (I think.)
Reminder: you need to wrap a piece of tape around the PVC pipe. And the front and end cap-tubes need to be large enough to allow for this layer of tape. Otherwise the thumbscrews don't grip the pipe. Standard plastic electrical tape works but I am experimenting with different kinds of tape. I'll report back...
I'll repeat that the main point of this version is to reduce the time spent printing. It takes a lot of time to print the center tube. It only takes a few minutes to cut a different length of 2" PVC pipe, if needed. The original Xtend-a-Slide was king when it came to adaptability, but, well, the Xtend-a-Slide isn't made anymore. But we have 3D printers and Home Depot.
I removed the slide on rims on the front plate and slide/negative carriers because printing the rims also took a lot of time and filament. The rim options are still in the code and you can re-enable them. And the code for the original Xtend-a-Slide tubes (1st prototype) are still in transidupe.scad. There might still be options for disabling nut traps and going back to slits (and hose clamps). But I haven't tested to see if these options still work. PVC pipe and nut traps are the way I'm swinging now.
Except for the 6x6 (120 film) version. I haven't really worked on this but I don't think that PVC pipe will work. You need to go to 3 inch pipe for 120 film and this makes the whole thing be larger and heavier than I am comfortable with. So I will probably go back to some variation of the old version when I look at 120 film. (I don't have any 6x6 slides. You can't process 120 film into mounted 6x6 sliides. You need to mount them yourself and, frankly, I'm not going there. But I will do a 120 film negative holder because 120 film is still quite popular. And because I have a Rollicord that my wife got for $10 in a garage sale that works very well.)

I changed part = "exploded" to show the new PVC pipe oriented versions. (You can 3D print a length of fake PVC pipe, if you want (part = "pvctube" and set the pvctube_ht variable to the length of fake PVC pipe you want to print.))
part = "exploded_old" to see the first generation parts.
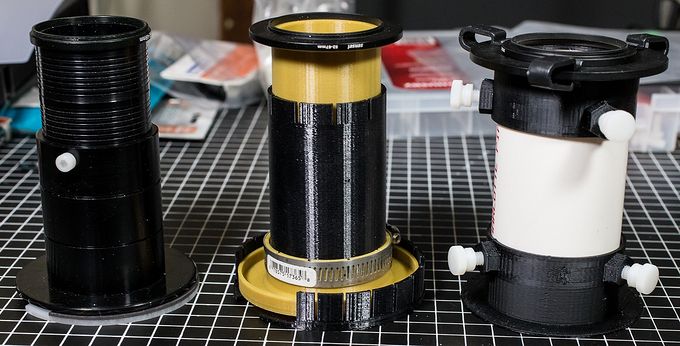
Left to right, a real Xtend-a-Slide. My first 3D printed version that sort of emulated an Xtend-a-Slide. And my current version that uses PVC pipe. Note new enhancements: You can have as many nut traps as you want. I'm going with three right now. One will probably do but three is insurance in case your end cap bracket ends up a bit too large and you don't want to tweak a single variable and reprint it. (The middle version has a single nut trap but it is in back and not visible because I didn't think to turn it around. See the earlier description to see what the nut trap looks like.)
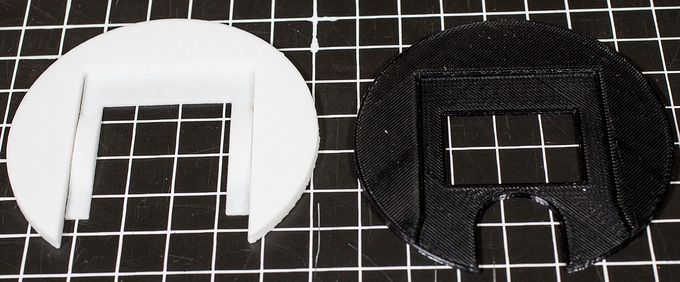
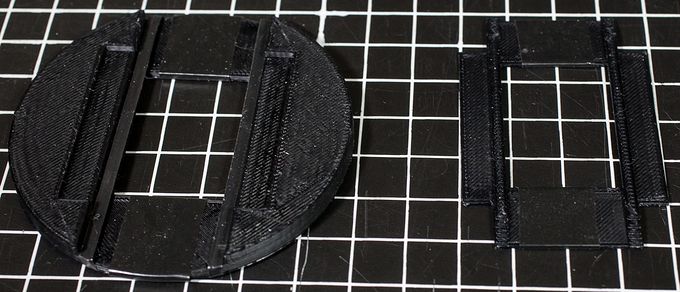
Closeup of Duplhood-style "springpart" (part="springpart" and Xtend-a-Slide style slide carriers (part=slidecarrier. They seem to work about equally well.
Negative carrier based on my old customized Xtend-a-Slide negative carrier. (part="negativecarrier" and part=negativecarriertop") Note that I am still using 1/8" "Art" tape to protect the spricket hole area. I also put a piece of standard electrical tape in the center, to protest the image area of the negative from rubbing against the rough 3D printed surface. (I am still fidding with getting the dimensions right. This will be reworked ASAP. But the version shown can be printed by the most recent code. It looks ugly because of glare. Snapshots...)
Contact me about questions or suggestions
Questions? Write to transidupe@frogymandias.org