Inverting and color correcting a negative linear TIFF with Adobe PhotoShop
At this point the RAW file has been converted into a linear 16 bit TIFF file (no gamma correction) It has been white balanced.
Load the linear TIFF file into Photoshop
Open the TIFF file in Photoshop. If there is a mismatch between your normal working space (typically is 'sRGB', 'Adobe RGB (1998)', or 'ProPhoto') you should see this dialog box.
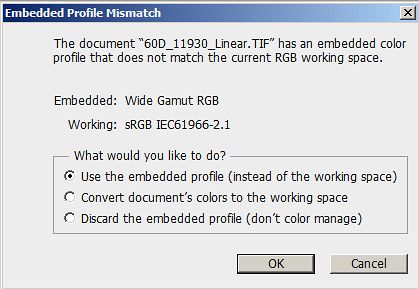
We want to use the embedded profile
Change the little triangle thingie on the status line so it shows "Document Profile". It should be showing ") if you followed my recommendations.
if you followed my recommendations.
Straighten and crop away the edge of the frame so all you have is image. It should look something like this:
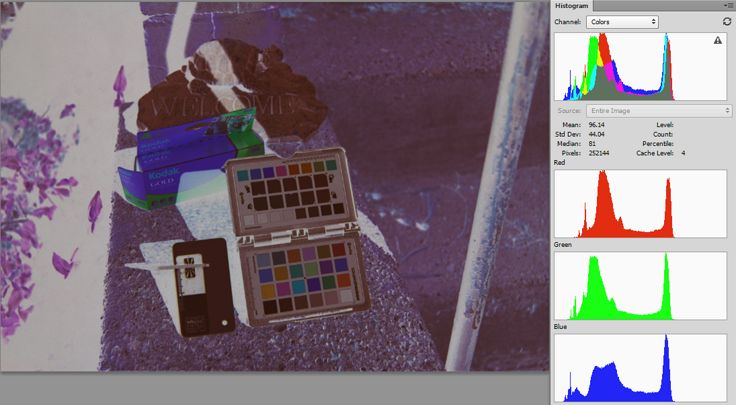
Still negative, but white balanced
The Red, Blue, and Green channels are approximately equal because DPP did a good job of white balancing.
Invert the negative file and make it positive
Now we need to invert the file by using Ctrl-I on the keyboard. The image should change from negative to positive. But it will be very bright and the colors will probably look wonky at this point.
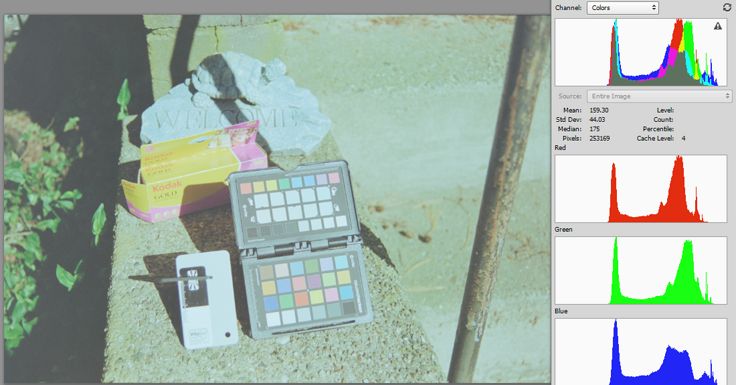
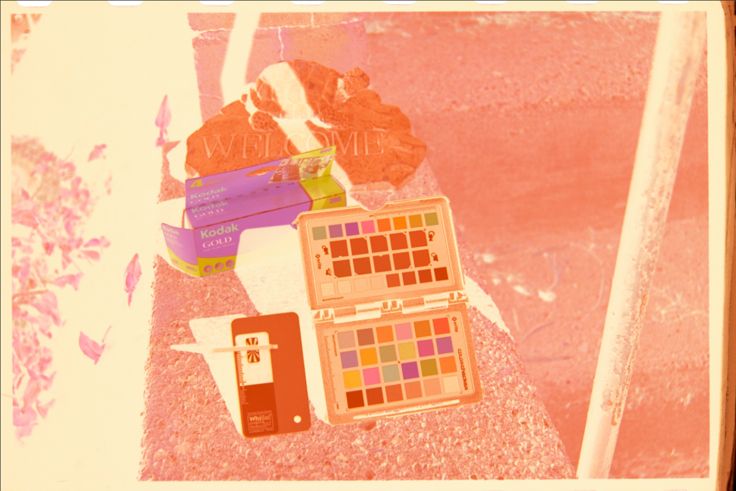
Inverted but is too bright (because it needs gamma correcting) and the colors need fixing
The negative has been inverted. Whereas an image that looked dark because it is linear and hadn't been gamma corrected will now look too bright. Because it is inverted and everything is backwards. And we haven't done anything yet to correct colors. 'OK' out of Curves and open Levels (Ctrl-L)
Set the black and white points for the Red, Green, and Blue channels.
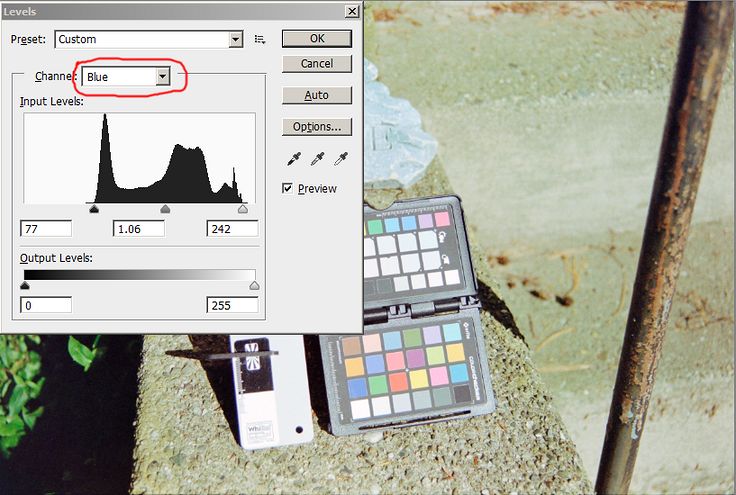
Adjust the white and black point for each of the R, G, and B channels in Levels.
In Levels, click on each of the Red, Green and Blue channels in turn. In each channel, adjust the outside left and right sliders to fit the edge of the histogram. Do not adjust the middle slider. Click "OK" to get out of Levels.
Correct the gamma
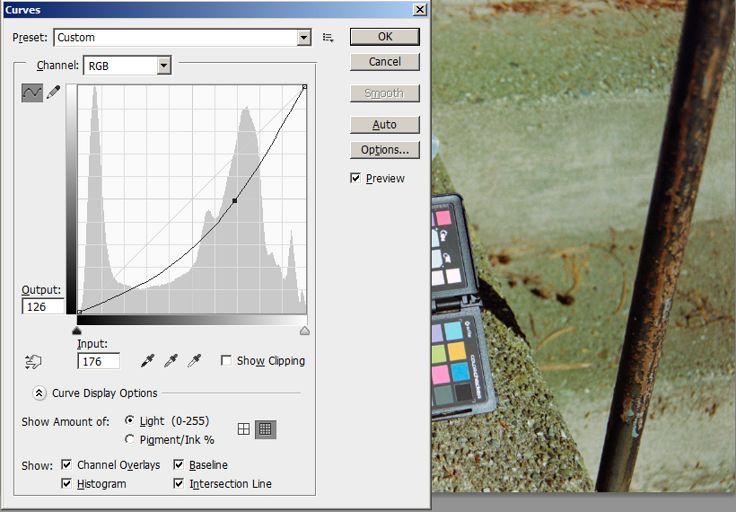
Correcting in Levels
Open the Curves dialog (Crtl-M) Adjust gamma by dragging the center of the RGB curve down. This should darken the image. Adjust the RGB curve until it is the desired brightness. Click OK to exit Curves
Fine tune the colors
Correcting in Levels
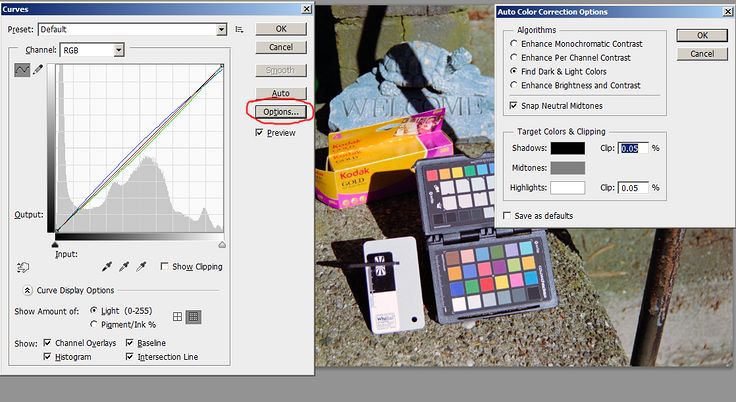
Open Curves again. Click on the "Options" button. Try the different algorithms to see which one looks best. For each algorothm, click "Snap Neutral Midtones" on and off. When you find the options that looks best, click "OK." You are still in Curves. Carefully examine the image. If you feel that it still needs correcting, open each of the R, G, and B curves and make any changes you feel it needs. Do the whites have a pinkish cast? Then add a point near the top of the Red curve and drag it down a bit. Do the shadows have a blueish cast? Open the Blue curve, add a point near the bottom and drag it down. etc. Adjust the RGB curve to fine tune brightness. If you feel that the image needs more (or less) contrast, add points near the top and bottom. To increase contrast, pull the top point upwards and pull the bottom point down. When you are happy, click "OK" to get out of Curves.

Almost done
After this use any other PS tool that will help. Shadows/Highlights, etc. Change the color space to sRGB (or whatever you need) as a final step (Edit/Convert to profile). Change to 8 bits (Image/Mode/8 bits per channel.) I usually keep the 16 bit TIFF but you probably should also save a copy as 8 bit JPG.
The final version. Film vs. Digital
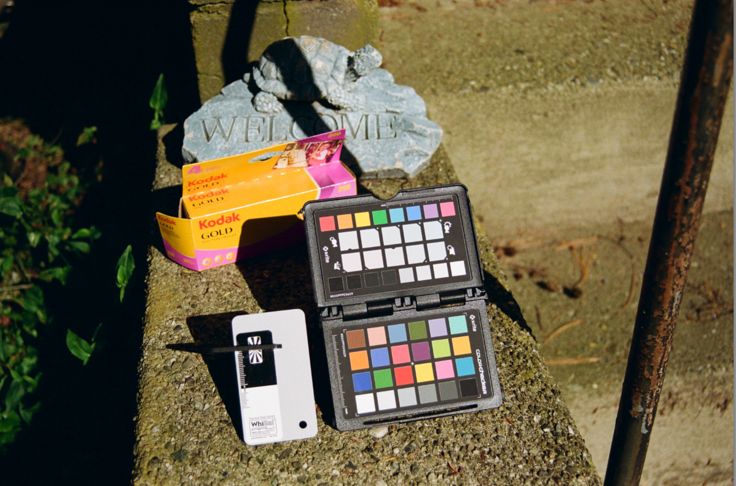
The "Almost done" version needed some more tweaking. I saw that the whites (on the WhiBal card) had a pinkish tinge. And the image have a blueish cast. So I opened up Curves again an bent the top part of the Red curve down to eliminate the pinkish cast in the whites. Then I lowered the blue curve to remove the slight blue cast. After I was done with Curves, I cropped it so match the EOS-M images as close as possible. Yielding:
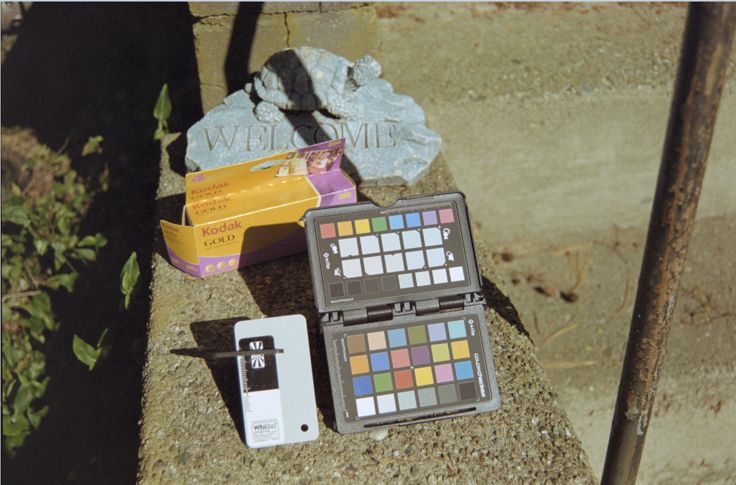
Original Kodak Gold 200 negative.
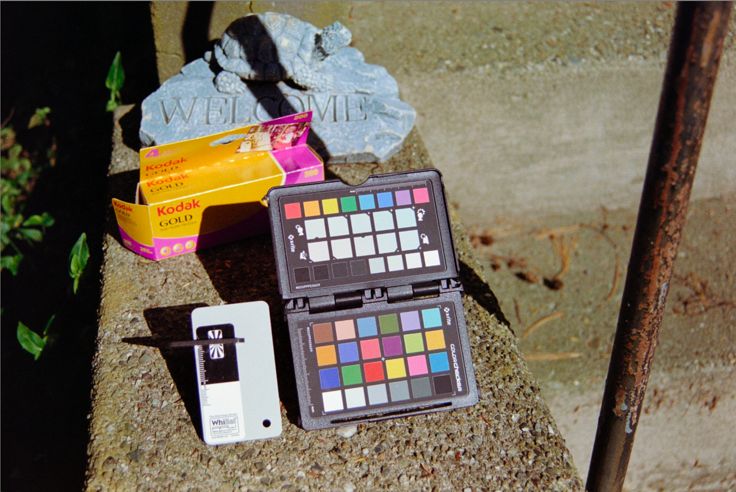
Final version of the color corrected Kodak Gold 200 negative.
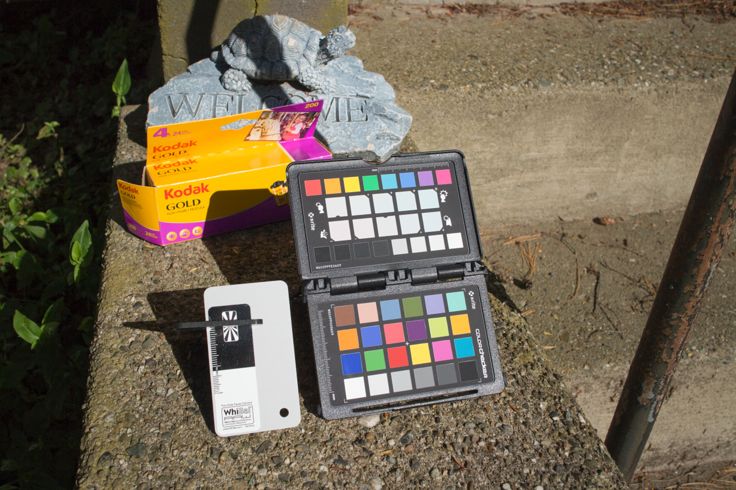
The same scene taken on a Canon EOS-M
The Kodak Gold 200 negative scanned by Dwayne's Photo at the time of processing
The Kodak Gold 200 negative Converted from a DPP Linear TIFF by VueScan
A conversion from the .CR2 RAW file looked identical, so you might just as well convert from the .CR2 file and skip the pass through DPP. If the VueScan conversion is acceptable.

The Kodak Gold 200 negative Converted from a Linear TIFF by VueScan
VueScan was set for "Kodak Gold 200 Gen 6"
The top corrected image is the final version of the color corrected frame of Kodak 200 negative. The next image was taken by a Canon EOS-M mirrorless at the same time that the film image was taken. The framing doesn't quite match because these were hand held. And the colors don't match exactly, because these are two very different processes. And because "calibration" was done in the final step of hand adjusting R, G, and B curves.
Next comes a scan that was done by Dwayne's Photo, done at the time of processing. Followed by a conversion by VueScan (of the Linear TIFF that was exported from Canon DPP.)
Questions? Write to camerascanning@frogymandias.org